Here is the simple step-by-step guide to install SSAS (SQL Server Analysis Service 2019) with screenshots.
Setup:
- Windows: 2019
- SSAS 2019
- SSAS Default port is 2383 (add this port in firewall inbound rules)
Before you start installing SSAS:
- Make sure you have admin rights on the Windows server
- Copy the setup files to the server ( No separate SSAS setup file, just copy the SQL setup file)
- Restart the server (Make sure there are no pending updates that require a restart)

Installing SSAS 2019:
If your setup file is ‘.ISO’ then we need to mount the SQL Server setup file

We should run the mounted file

If your setup file is not ‘.ISO’ then your actual installation starts from the below step
Step 1:
Right-click on ‘setup.exe’ and ‘Run as administrator’

Step 2:
A window opens
Go to ‘Installation’ and select ‘New SQL Server stand-alone installation or add features to an existing installation

Step 3:
As we usually do not allow internet on the servers hit ‘Next’

Step 4:
Ignore the firewall-related warning and hit ‘Next’

Step 5:
In the Installation Type section, either we can install a new instance or we can use the existing instance. For our case, we want to use the existing database for SSAS so we checked the existing instance and hit ‘Next’

Note: If we install as a new instance then we have to choose Development / Enterprise and provide the necessary key (our DB is Developer)

Step 6:
In the Feature Selection window, check ’Analysis Services’ and hit ‘Next’.
- We can see Database Engine is grayed out as it was installed already

Step 7:
In the Feature Rules section check if any errors are there, here none. Hit ‘Next’

Step 8:
In the Server Configuration pane, we have two tabs that give the below details then hit ‘Next’
Service Accounts: Give if your DB is running under any specific service account (or leave it as is) by selecting Startup Type ‘Automatic’
Collation: Give if your DB is running under any specific collation (or leave as is)

Step 9:
In the Analysis Services Configuration, select Tabular (default), for other modes the installation process is almost the same. After reviewing the below points hit ‘Next’
- Add current user / any other user
- We are installing on development so going with the default location which is C

Step 10:
In the Ready to Install pane, just hit ‘Install’

We can see the installation success wizard upon completion. We can follow this process to install SSAS in any version of SQL (2016,2017,2019 0r 2022)

Verify SSAS Installation:
We can check from services

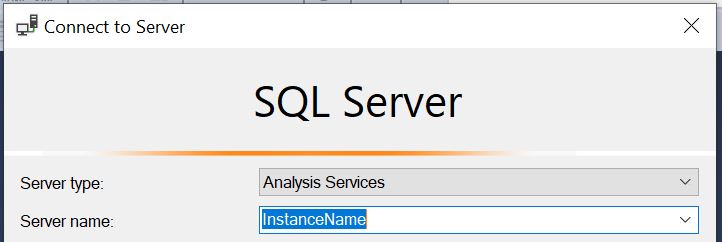
From SSMS
- Select Analysis Services and give the instance name

Granting Access to Users:
- We can add users while installing SSAS (or)
- Right-click on SSAS connected instance

- Go to the security tab and add the required users
